Written by
Published on
March 6, 2026

Professional heating installation refers to the full-service process provided by licensed HVAC contractors who assess, remove, install, commission, and warrant home heating systems to meet safety, efficiency, and comfort goals. Hiring a professional matters because correctly sized equipment and precise commissioning reduce energy waste, prevent safety hazards like carbon monoxide, and preserve manufacturer warranties, which together protect your investment and indoor comfort. This guide explains the heating installation process step-by-step, the measurable benefits of professional work, typical replacement costs and financing options, how to vet contractors, and how to prepare your home so installation day goes smoothly. Readers will find practical checklists, comparison tables, and featured-snippet style summaries to answer common homeowner questions such as “what to expect during furnace installation” and “how much does a heating system replacement cost.” By the end you will understand the technical and practical milestones of a heating installation and be ready to compare contractors and estimates with confidence.
The professional heating installation process begins with a site-specific assessment and ends with system commissioning and homeowner training, ensuring the new system performs to spec. Contractors perform a load calculation, inspect ductwork and controls, remove existing equipment safely, install the new unit and required components, and then test and balance the system so it delivers designed capacity and efficiency. Proper sequencing reduces callbacks and optimizes energy performance, which is why many installers follow a standard timeline that includes planning, removal, installation, testing, and documentation. Understanding these stages helps homeowners set realistic expectations for timing, disruption, and final performance verification.
Professional heating installation typically follows these steps:
The numbered sequence above clarifies the workflow you should expect, and the next section explains the initial consultation and assessment in greater detail so you can prepare the necessary information and access.
The initial consultation centers on a Manual J load calculation, which quantifies the heating and cooling demand of the home based on insulation levels, window area, orientation, occupancy, and local climate. A qualified HVAC technician collects key data—square footage, ceiling heights, duct layout, thermostat location, insulation type, and existing equipment performance—to determine the correct system capacity and distribution strategy. Accurate sizing avoids the common problems of oversized cycling or undersized chronic shortfall and establishes baseline expectations for efficiency and comfort. Homeowners can support the assessment by providing recent utility history if available and by pointing out problem rooms, which helps the installer identify needs for zoning or duct modifications and leads naturally into the removal and installation planning that follows.
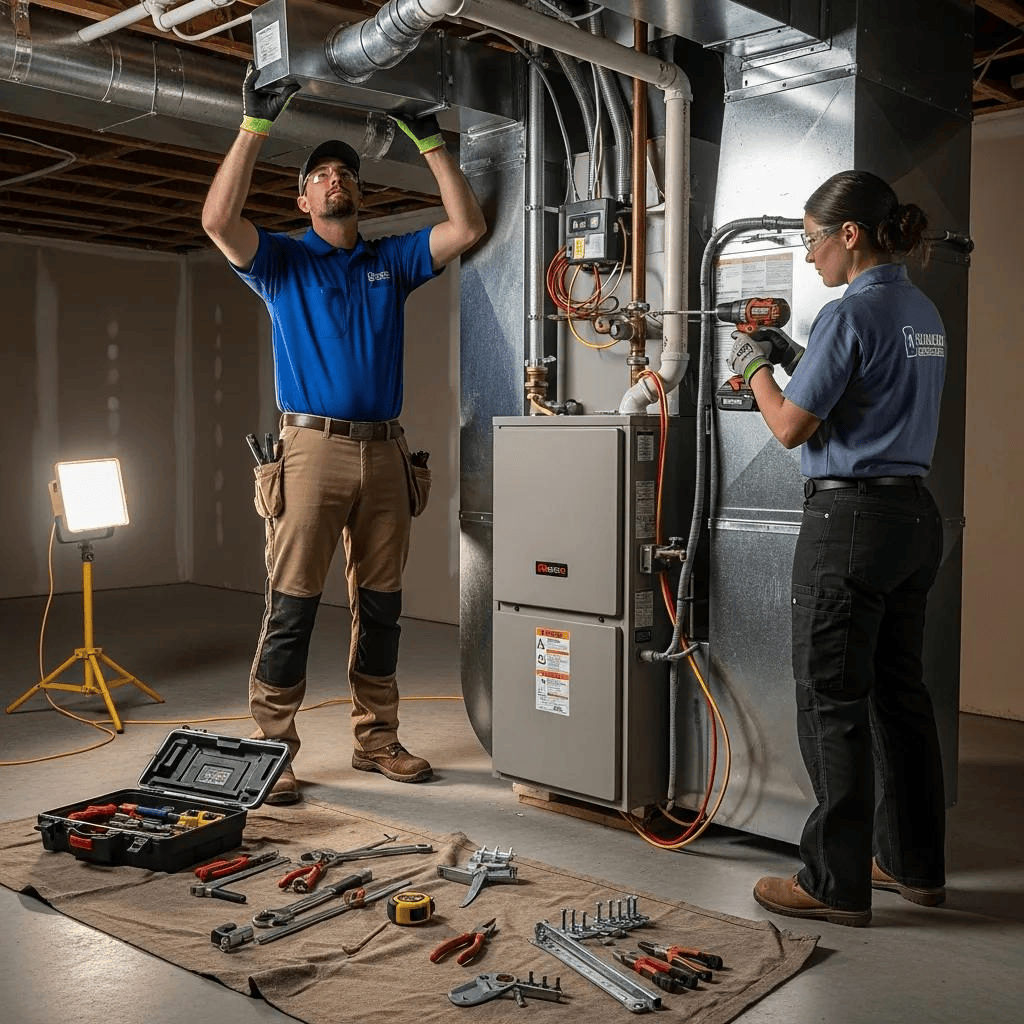
Removal and installation proceed in a controlled, safety-first sequence beginning with power and fuel isolation, refrigerant recovery when applicable, and containment to minimize dust and debris. Technicians disconnect electrical and gas feeds, recover refrigerant to meet environmental regulations, and carefully remove the old furnace, heat pump, or boiler, then inspect and prepare the mounting area and duct connections for the replacement. Installation covers setting the new unit, connecting electrical and fuel lines, modifying or sealing ductwork, and installing controls and safety devices; the team then charges refrigerant (for heat pumps), performs electrical checks, and runs initial start-up tests. Expect some noise, temporary loss of heat during the swap, and a multi-hour work window; the final stage is commissioning, which verifies system performance and transitions into the homeowner walkthrough described next.
Professional installation delivers measurable benefits: higher operational efficiency, stronger safety compliance, preserved and extended warranties, and longer equipment life through correct commissioning and maintenance setup. When installers size systems with Manual J, seal and insulate ductwork, and calibrate controls, homes tend to achieve better comfort balance and lower utility bills compared with improperly installed systems. Professionals also follow code and safety protocols—such as combustion safety checks and proper venting—which reduce risk and liability. Understanding these advantages helps homeowners weigh estimates on more than price alone and explains why a slightly higher upfront cost for expert installation often leads to lower lifetime cost and fewer service calls.
Below is a practical comparison of outcomes between professional installation and DIY/unlicensed approaches to highlight value differences and guide decision-making.
This table underscores why many homeowners prioritize professional installation despite higher initial estimates, and the next paragraphs explore specific efficiency, safety, and warranty gains in greater depth.
Professional installers achieve energy efficiency through correct equipment sizing, accurate refrigerant charging for heat pumps, proper duct sealing, and optimized control settings that reduce cycling and heat loss. Each technical step—Manual J sizing, airflow measurement, and thermostat calibration—affects how efficiently your system converts energy into comfort, directly lowering monthly utility costs. Safety improvements stem from proper combustion testing, venting verification, and electrical circuit checks that reduce fire and carbon monoxide risks. The combined result is a system that operates predictably, safely, and cost-effectively; the following subsection explains how these practices tie into preserving warranty coverage and long-term reliability.
Choosing the right contractor combines credential verification, experience review, clear written estimates, and warranty clarity to ensure a reliable installation and post-installation support. Look for licensing in your state, proof of liability and workers’ comp insurance, technical certification such as EPA where relevant, and manufacturer dealer status indicating authorized training. Collect multiple written bids, compare the scope of work rather than just total price, and request references or recent local installations similar to your project. The checklist below provides a quick actionable screening method you can use during initial calls or interviews with prospective contractors.
Use this checklist when vetting contractors:
After using this checklist to narrow candidates, the following table explains how to verify key credentials and why they matter to homeowner protection.
These verification steps reduce risk and increase the chances of a smooth installation; LakeFront Air Conditioning LLC lists licensed and insured technicians and Elite Dealer recognition for certain product lines, which homeowners can use as an example when comparing contractor credentials. After verifying credentials, the next subsection lists the specific questions you should ask to gauge experience and guarantees.
Homeowners should request and validate the contractor’s state license number, general liability insurance, and workers’ compensation coverage, since these documents protect against liability and ensure contractor accountability. Technical certifications validate skills in diagnosing and installing HVAC systems, while EPA 608 certification is required for technicians who handle refrigerants; manufacturer dealer or Elite Dealer status signals deeper training on certain branded products. Verification is straightforward: request certificates, photo IDs of assigned technicians, and insurance certificates listing your property as the job site; then confirm license and insurance status with the issuing agencies if needed. Ensuring these credentials before work begins helps preserve warranty coverage and reduces the risk of incomplete or unsafe installations.
Ask targeted questions that reveal how the contractor handles scope, quality control, and post-installation support, and look for clear, confident answers with documentation. Key questions include: how do you perform the Manual J and duct analysis; can you provide references for similar local installs; what warranties and extended options are included in writing; who handles permits and code inspections; what is the expected timeline and disruption; and how are change orders priced and approved? Each question helps you evaluate the contractor’s process orientation and transparency; satisfactory answers should reference documented procedures, timelines, and written guarantees. Use the contractor’s responses to compare trustworthiness and to form the basis of the written contract you will sign before work begins.
Preparing your home reduces install time, protects belongings, and helps technicians work efficiently—leading to lower labor costs and fewer surprises. Basic preparatory steps include clearing furniture and personal items from the work area, ensuring safe access to basements or attics, securing pets, and making arrangements for children and occupants during periods of loud work. Provide the installers with utility access and clear paths to the equipment location, and protect floors and valuables with drop cloths if needed. Effective preparation complements the contractor’s safety protocols and contributes to a smoother, faster installation followed by a comprehensive walkthrough.
Do a room-by-room sweep to move furniture away from the furnace, ducts, or outdoor unit area and remove wall hangings and fragile items from adjacent walls and hallways. Cover floors and furniture with sheets or protective film where installers will pass through, secure pets in a separate area, and keep children informed about safety zones to avoid. If installation requires attic or crawlspace access, clear items blocking entry and ensure lighting or an extension cord is available if requested by the crew. These actions reduce the time technicians spend creating access and decrease the likelihood of accidental damage, which helps the project stay on schedule and within budget.
Be present or designate a trusted adult to answer questions, approve final settings, and receive documentation and warranties; technicians will need permission to access closed areas and to make minor changes as needed. Expect the crew to walk you through system operation, thermostat programming, and maintenance recommendations at the end of the job, and request that they leave startup paperwork, warranty registration details, and a simple maintenance checklist. Confirm final payments and any remaining scheduling for follow-up service before the crew departs, and keep contact information for post-install support handy. Clear communication and a final walkthrough ensure you understand system operation and what to expect in the first weeks of service.
These practical steps complete the homeowner preparation guidance and lead directly into effective post-install maintenance and expected performance monitoring that will preserve efficiency and warranty coverage.
Choosing professional heating installation services ensures optimal efficiency, safety, and longevity of your heating system, ultimately protecting your investment. By understanding the installation process and the benefits of expert service, homeowners can make informed decisions that lead to lower energy bills and enhanced comfort. Take the next step towards a reliable heating solution by exploring our trusted contractor recommendations. Ensure your home stays warm and efficient—contact us today for personalized assistance.
Professional heating installation refers to the full-service process provided by licensed HVAC contractors who assess, remove, install, commission, and warrant home heating systems to meet safety, efficiency, and comfort goals. Hiring a professional matters because correctly sized equipment and precise commissioning reduce energy waste, prevent safety hazards like carbon monoxide, and preserve manufacturer warranties, which together protect your investment and indoor comfort. This guide explains the heating installation process step-by-step, the measurable benefits of professional work, typical replacement costs and financing options, how to vet contractors, and how to prepare your home so installation day goes smoothly. Readers will find practical checklists, comparison tables, and featured-snippet style summaries to answer common homeowner questions such as “what to expect during furnace installation” and “how much does a heating system replacement cost.” By the end you will understand the technical and practical milestones of a heating installation and be ready to compare contractors and estimates with confidence.
The professional heating installation process begins with a site-specific assessment and ends with system commissioning and homeowner training, ensuring the new system performs to spec. Contractors perform a load calculation, inspect ductwork and controls, remove existing equipment safely, install the new unit and required components, and then test and balance the system so it delivers designed capacity and efficiency. Proper sequencing reduces callbacks and optimizes energy performance, which is why many installers follow a standard timeline that includes planning, removal, installation, testing, and documentation. Understanding these stages helps homeowners set realistic expectations for timing, disruption, and final performance verification.
Professional heating installation typically follows these steps:
The numbered sequence above clarifies the workflow you should expect, and the next section explains the initial consultation and assessment in greater detail so you can prepare the necessary information and access.
The initial consultation centers on a Manual J load calculation, which quantifies the heating and cooling demand of the home based on insulation levels, window area, orientation, occupancy, and local climate. A qualified HVAC technician collects key data—square footage, ceiling heights, duct layout, thermostat location, insulation type, and existing equipment performance—to determine the correct system capacity and distribution strategy. Accurate sizing avoids the common problems of oversized cycling or undersized chronic shortfall and establishes baseline expectations for efficiency and comfort. Homeowners can support the assessment by providing recent utility history if available and by pointing out problem rooms, which helps the installer identify needs for zoning or duct modifications and leads naturally into the removal and installation planning that follows.
Removal and installation proceed in a controlled, safety-first sequence beginning with power and fuel isolation, refrigerant recovery when applicable, and containment to minimize dust and debris. Technicians disconnect electrical and gas feeds, recover refrigerant to meet environmental regulations, and carefully remove the old furnace, heat pump, or boiler, then inspect and prepare the mounting area and duct connections for the replacement. Installation covers setting the new unit, connecting electrical and fuel lines, modifying or sealing ductwork, and installing controls and safety devices; the team then charges refrigerant (for heat pumps), performs electrical checks, and runs initial start-up tests. Expect some noise, temporary loss of heat during the swap, and a multi-hour work window; the final stage is commissioning, which verifies system performance and transitions into the homeowner walkthrough described next.
Professional installation delivers measurable benefits: higher operational efficiency, stronger safety compliance, preserved and extended warranties, and longer equipment life through correct commissioning and maintenance setup. When installers size systems with Manual J, seal and insulate ductwork, and calibrate controls, homes tend to achieve better comfort balance and lower utility bills compared with improperly installed systems. Professionals also follow code and safety protocols—such as combustion safety checks and proper venting—which reduce risk and liability. Understanding these advantages helps homeowners weigh estimates on more than price alone and explains why a slightly higher upfront cost for expert installation often leads to lower lifetime cost and fewer service calls.
Below is a practical comparison of outcomes between professional installation and DIY/unlicensed approaches to highlight value differences and guide decision-making.
This table underscores why many homeowners prioritize professional installation despite higher initial estimates, and the next paragraphs explore specific efficiency, safety, and warranty gains in greater depth.
Professional installers achieve energy efficiency through correct equipment sizing, accurate refrigerant charging for heat pumps, proper duct sealing, and optimized control settings that reduce cycling and heat loss. Each technical step—Manual J sizing, airflow measurement, and thermostat calibration—affects how efficiently your system converts energy into comfort, directly lowering monthly utility costs. Safety improvements stem from proper combustion testing, venting verification, and electrical circuit checks that reduce fire and carbon monoxide risks. The combined result is a system that operates predictably, safely, and cost-effectively; the following subsection explains how these practices tie into preserving warranty coverage and long-term reliability.
Choosing the right contractor combines credential verification, experience review, clear written estimates, and warranty clarity to ensure a reliable installation and post-installation support. Look for licensing in your state, proof of liability and workers’ comp insurance, technical certification such as EPA where relevant, and manufacturer dealer status indicating authorized training. Collect multiple written bids, compare the scope of work rather than just total price, and request references or recent local installations similar to your project. The checklist below provides a quick actionable screening method you can use during initial calls or interviews with prospective contractors.
Use this checklist when vetting contractors:
After using this checklist to narrow candidates, the following table explains how to verify key credentials and why they matter to homeowner protection.
These verification steps reduce risk and increase the chances of a smooth installation; LakeFront Air Conditioning LLC lists licensed and insured technicians and Elite Dealer recognition for certain product lines, which homeowners can use as an example when comparing contractor credentials. After verifying credentials, the next subsection lists the specific questions you should ask to gauge experience and guarantees.
Homeowners should request and validate the contractor’s state license number, general liability insurance, and workers’ compensation coverage, since these documents protect against liability and ensure contractor accountability. Technical certifications validate skills in diagnosing and installing HVAC systems, while EPA 608 certification is required for technicians who handle refrigerants; manufacturer dealer or Elite Dealer status signals deeper training on certain branded products. Verification is straightforward: request certificates, photo IDs of assigned technicians, and insurance certificates listing your property as the job site; then confirm license and insurance status with the issuing agencies if needed. Ensuring these credentials before work begins helps preserve warranty coverage and reduces the risk of incomplete or unsafe installations.
Ask targeted questions that reveal how the contractor handles scope, quality control, and post-installation support, and look for clear, confident answers with documentation. Key questions include: how do you perform the Manual J and duct analysis; can you provide references for similar local installs; what warranties and extended options are included in writing; who handles permits and code inspections; what is the expected timeline and disruption; and how are change orders priced and approved? Each question helps you evaluate the contractor’s process orientation and transparency; satisfactory answers should reference documented procedures, timelines, and written guarantees. Use the contractor’s responses to compare trustworthiness and to form the basis of the written contract you will sign before work begins.
Preparing your home reduces install time, protects belongings, and helps technicians work efficiently—leading to lower labor costs and fewer surprises. Basic preparatory steps include clearing furniture and personal items from the work area, ensuring safe access to basements or attics, securing pets, and making arrangements for children and occupants during periods of loud work. Provide the installers with utility access and clear paths to the equipment location, and protect floors and valuables with drop cloths if needed. Effective preparation complements the contractor’s safety protocols and contributes to a smoother, faster installation followed by a comprehensive walkthrough.
Do a room-by-room sweep to move furniture away from the furnace, ducts, or outdoor unit area and remove wall hangings and fragile items from adjacent walls and hallways. Cover floors and furniture with sheets or protective film where installers will pass through, secure pets in a separate area, and keep children informed about safety zones to avoid. If installation requires attic or crawlspace access, clear items blocking entry and ensure lighting or an extension cord is available if requested by the crew. These actions reduce the time technicians spend creating access and decrease the likelihood of accidental damage, which helps the project stay on schedule and within budget.
Be present or designate a trusted adult to answer questions, approve final settings, and receive documentation and warranties; technicians will need permission to access closed areas and to make minor changes as needed. Expect the crew to walk you through system operation, thermostat programming, and maintenance recommendations at the end of the job, and request that they leave startup paperwork, warranty registration details, and a simple maintenance checklist. Confirm final payments and any remaining scheduling for follow-up service before the crew departs, and keep contact information for post-install support handy. Clear communication and a final walkthrough ensure you understand system operation and what to expect in the first weeks of service.
These practical steps complete the homeowner preparation guidance and lead directly into effective post-install maintenance and expected performance monitoring that will preserve efficiency and warranty coverage.
Choosing professional heating installation services ensures optimal efficiency, safety, and longevity of your heating system, ultimately protecting your investment. By understanding the installation process and the benefits of expert service, homeowners can make informed decisions that lead to lower energy bills and enhanced comfort. Take the next step towards a reliable heating solution by exploring our trusted contractor recommendations. Ensure your home stays warm and efficient—contact us today for personalized assistance.